Last update August 4, 2025
Welcome to Nembol!
Set up your account and start selling multichannel in less than a minute. Here’s a brief tutorial that will help you get started as quickly as possible. For any further support, don’t hesitate to contact us.
Step 0: What kind of seller are you?
There’s only one thing you need to pay attention to when setting up your Nembol account:
- Do you already have your products listed on 2 or more channels? In this case, you need to “CONNECT” your listings.
- Do you have your products on 1 channel only, or none? Then, you need to “PUBLISH”.
In both cases, Nembol will be able to sync your products and inventory.
Now we’ll tell you exactly what you need to do depending on your case.
How to connect listings across channels
If you want to connect listings across 2 or more channels, please note that:
- Your listings must have the same variations across every channel.
- Your listings must have identical and matching SKU codes.
Step 1: Connect your channels
In either case, the first thing you should do is connecting at least one channel to Nembol.
- If you want to CONNECT listings, start with the one you consider your main channel. This will be the source of truth for the inventory, and product content.
- If you have your products on 1 channel only, connect this one.
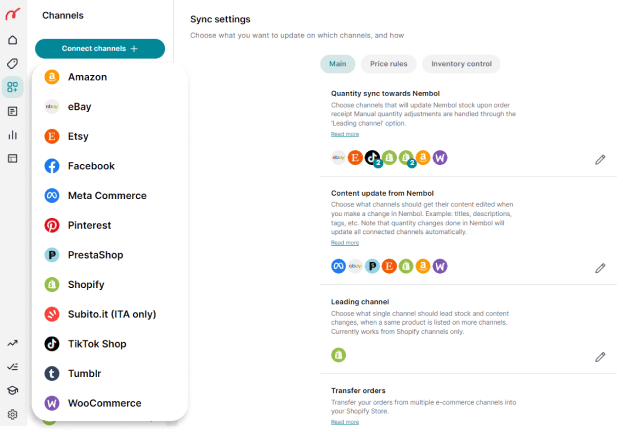
This is the list of our currently supported integrations.
How to connect a new channel
Generally speaking, you need to:
- Go to the Channels Tab.
- Click on the “Connect channels +” button.
- Click on the channel you want to connect, and follow the instructions displayed.
- You’ll be immediately transferred on a page on the channel’s website, where you’ll be asked by the channel to login and grant the necessary authorizations to the Nembol app.
- Once this step is completed, you’ll be returned into Nembol App, with your desired channel connected and ready to be set up.
Congrats!
Step 2: Import your listings
On September 2nd 2024, we automated the import into Nembol of the active listings from the first channel you connect. You have to do nothing, and a few minutes after connecting your first channel, you’ll start seeing inside your Nembol account your currently active listings in that channel.
For many channels, Nembol enables also the import of drafts, or otherwise inactive listings, or selected categories or collections. For this, you’ll have to run subsequent imports, as follows.
Importing listings: methods
You have two ways of importing listings into Nembol:
- Direct import into Nembol from Amazon, eBay, Etsy, Shopify, WooCommerce, TikTok Shop, and PrestaShop. This is the most modern way, and what we advise.
- Import into Nembol via CSV file. This is used to get products from legacy systems such as Point of Sale systems (POS) or Warehouse Management Systems (WMS) or Enterprice Resource Planning systems (ERPs). CSV export-import may also be used from Nembol to Nembol to apply bulk edits to masses of listings at once, for instance adding barcodes.
You can import listings from your accounts only. Nembol can’t import listings via URL or from other sellers’ accounts.
How to filter the import
During the free trial, and later if you subscribed to the Pro plan and higher, you can filter the products that Nembol will import by accessing the “Import” settings:
- Go to the Channels Tab.
- Find the channel you want to import listings from (on the left-hand side of the page)
- Click on the “Import settings” section.
- Adjust the filters in the right pane of the page.
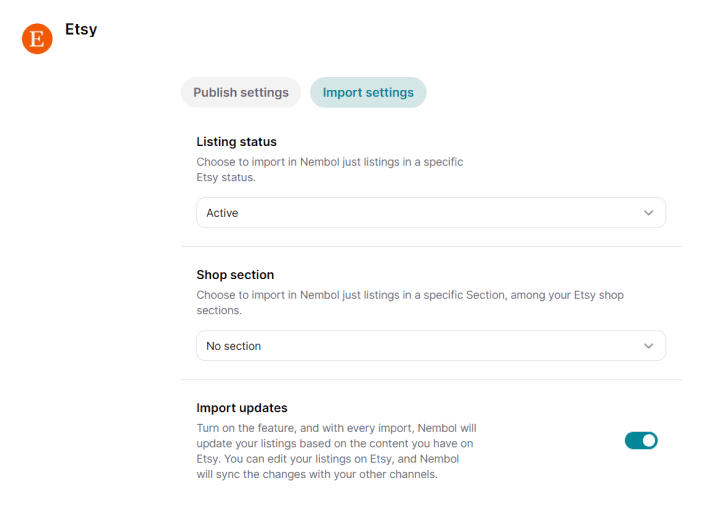
Available filters depend channel by channel as each has their rules. In the screenshot below you see an example of how the filters may look like for one channel.
How to start a direct import
To run the import from a channel, you need to:
- Go to the Products Tab.
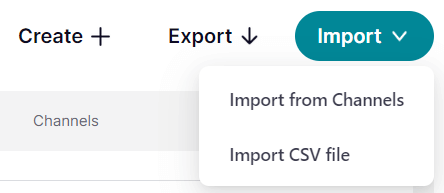
- Click on the “Import” button which you will find top right.
- Select “Import from Channels”.
- Choose the Channel from which you wish to import products.
- Click the “Import from Channel” button.
- Now the import has started. Let it work for a few minutes.
You can see the status of your import in the Activities Tab, which you’ll find bottom left in the main menu.
Please note: When choosing the channel, you’ll see an overview of the settings you have chosen. If you want to change one or more settings, click on the Settings button, and you’ll be sent back to the channel’s settings. Once you’ve changed them, settings will be automatically saved. Now start again with the import.
The import may take a while, depending on how many products you have. You can check the status of your import in the Activities Tab.
While Nembol is importing your products, you can go ahead and connect more channels.
Nembol creates no duplicates
Nembol doesn’t import a product from a given channel which is already in Nembol imported from that same channel.
This means that:
- You can run multiple imports from the same source, and Nembol will pull in new listings only.
- If you have the same product more than once in a given channel, and you import, Nembol will import all instances of that product from that channel.
- If you delete a product in Nembol, but you do not delete it in the channel, when you import again in Nembol, that product will be imported again.
How to import using a CSV file
Please, read the dedicated tutorial on importing via CSV: How to import products from a CSV file.
Step 3: Connect listings across channels
This section is meant for sellers who need to connect their existing listings across channels.
If you need to publish your listings instead, skip to the next section.
How to connect listings
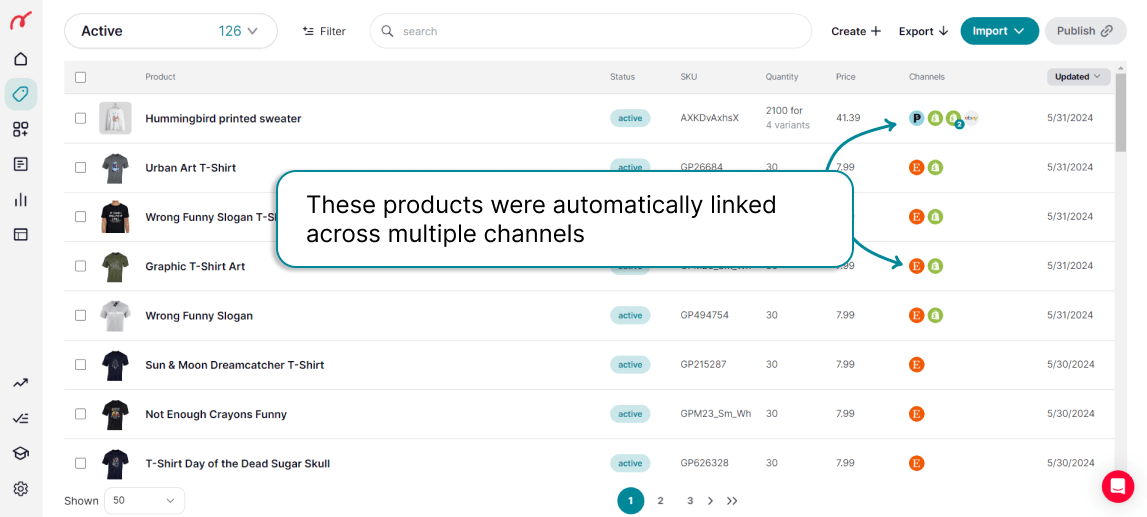
Connecting listings across channels is automatic.
All you have to do is running consecutive imports from each of your channels, starting with your main channel. Nembol will analyze your listings and connect them to each other if they have matching variations and matching SKU codes.
In your Activities Tab, you can check how many products have been:
- Imported – this is the total amount of imported products.
- Linked – of your imported products, how many are connected.
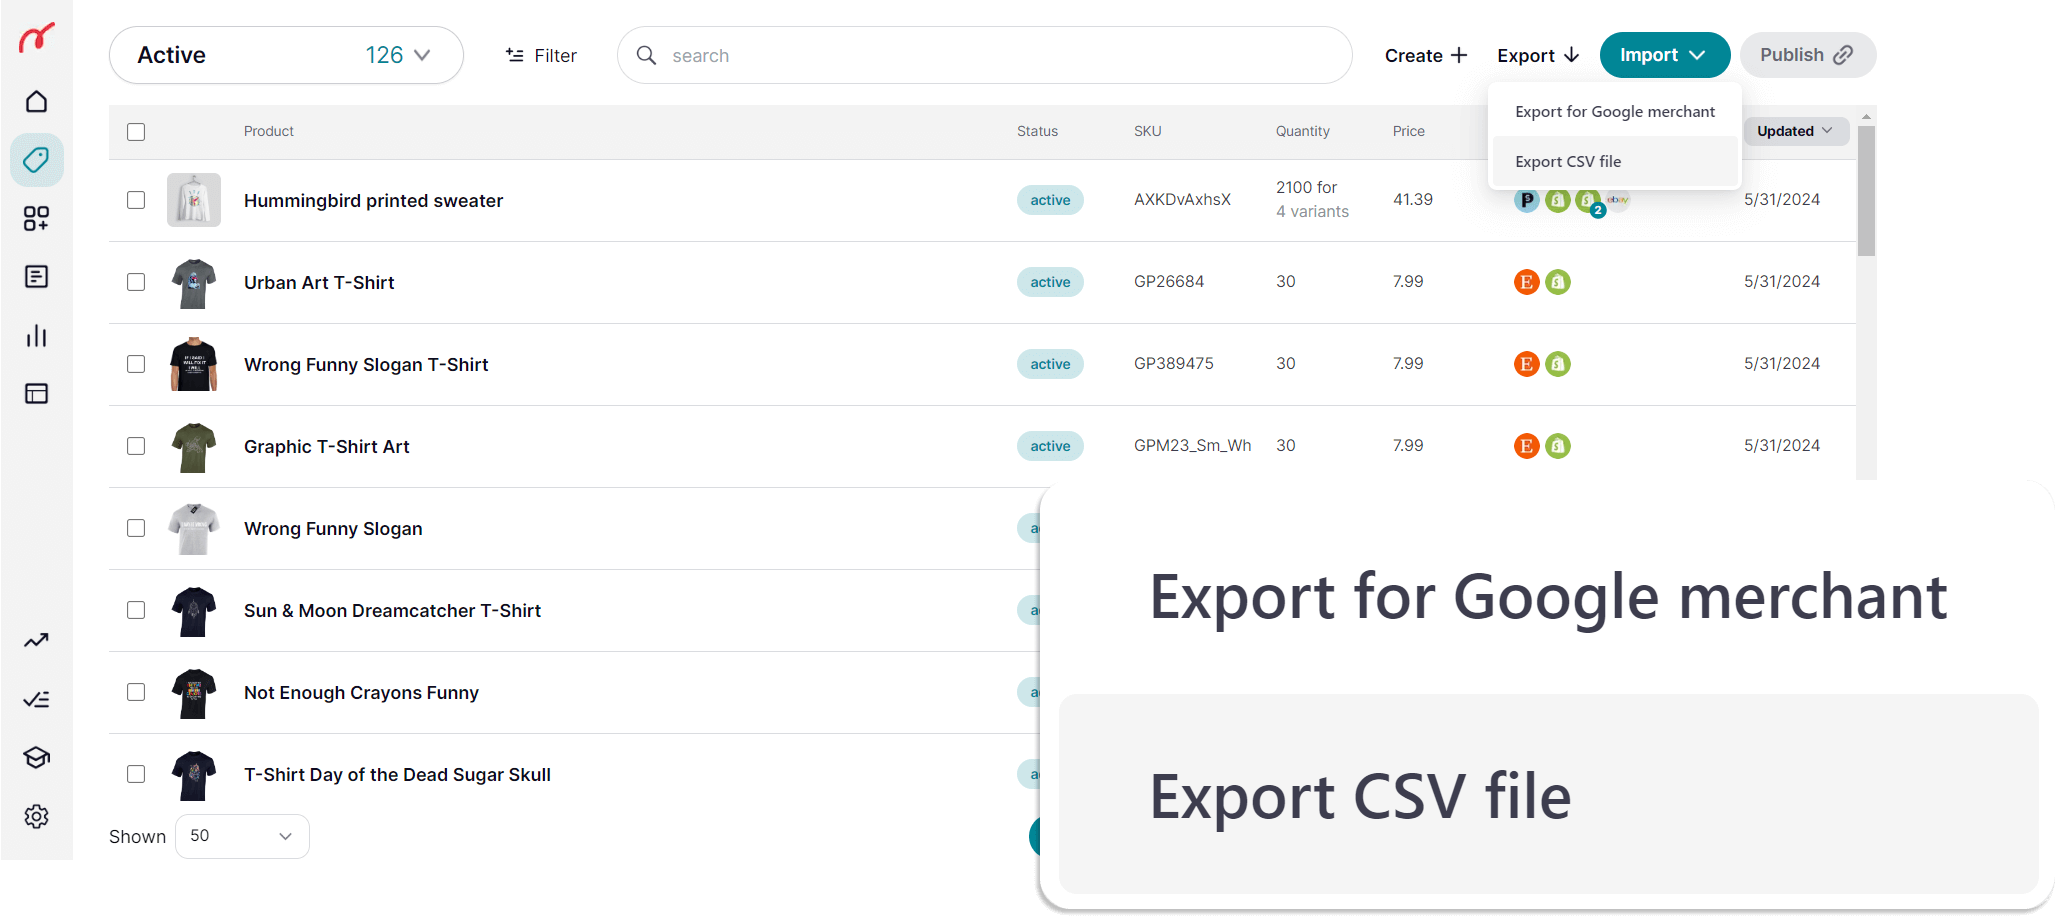
Listings that have been connected will show two or more channel icons on the Products Tab.
Please note: Always wait for the previous import to be complete before starting a new one, so that products that should link actually can find their homologue products.
More detailed information can be found here: Link listings across multiple channels
Step 4: Publish your listings
Once your products have been imported into Nembol, you can publish them to every connected channel.
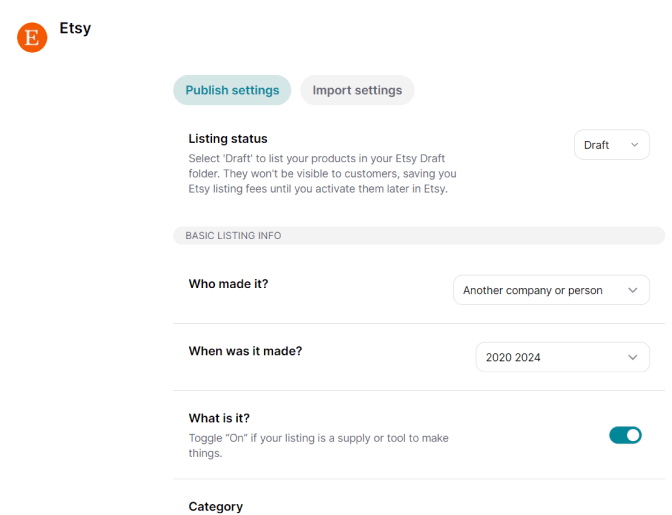
How to change Publish settings
All of our channels have dedicated settings that will help you publish your listings more effectively:
- Go to the Channels Tab.
- Pick a channel of choice.
- Click on the “Publish settings” section.
Here you will find some useful settings like product conditions, etc. You can also pick categories and collections. All will differ per channel.
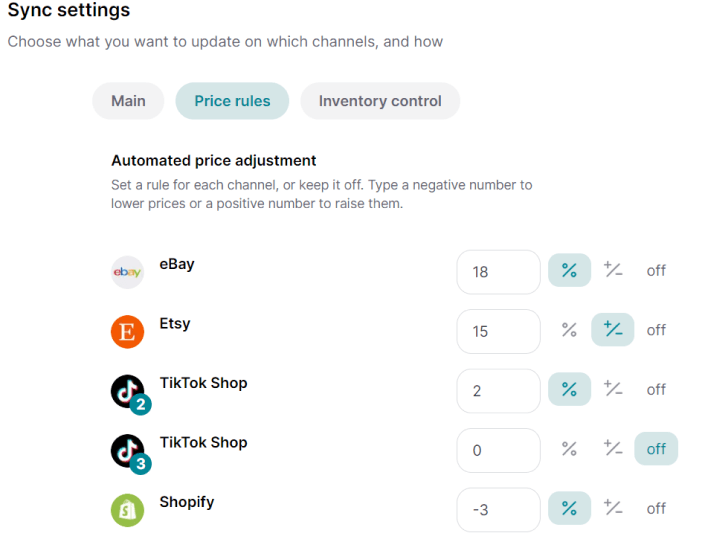
Before publishing, also check the sync settings, here you can find common settings like pricing rules, inventory limits, VAT rates, and more.
How to publish listings on additional channels
- Go to the Products Tab.
- Click on the “Filter” button.
- Choose which filter you want.
- Select the products you want to publish to a channel (up to 500 at a time).
- Click on the “Publish” button.
- Select the channels you want to publish on, and click “Publish Products” to confirm.
- You can see the status of your publish in the Activities Tab, bottom left in the main menu.
Products that have been correctly published will display two or more channel icons in your Nembol Products Tab.
Please note: because listing rules may vary from channel to channel, make sure there are no error signs inside Nembol next to your listings. In case, please read the error desciription and the hint to solve it.
A more detailed guide can be found at this page: How to cross-post products on multiple channels
During the free-trial, you can list up to 10 listings per channel.
Step 5: Activate the syncs
Your products are now successfully listed or linked on multiple channels. It’s time to activate the syncs.
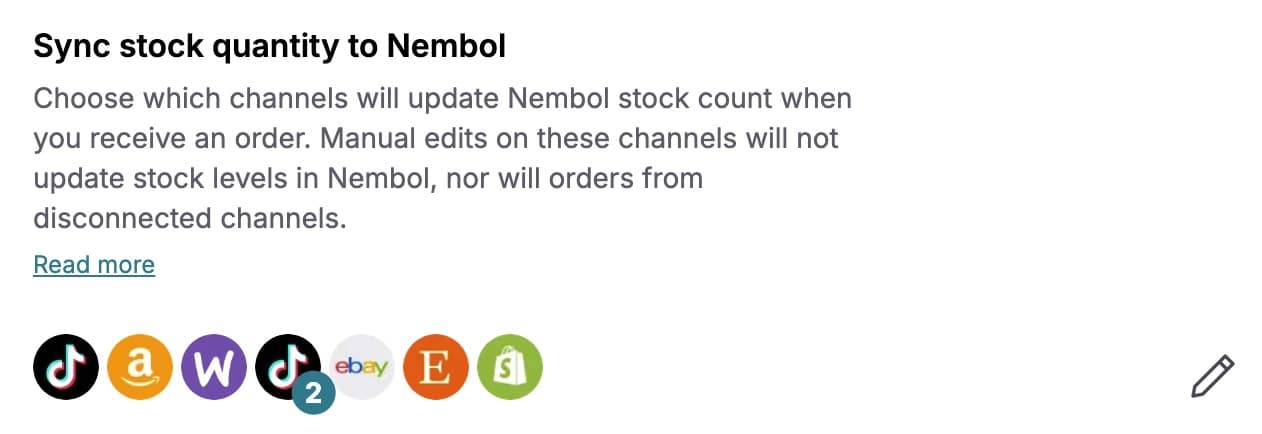
The Sync Settings for your Channels are on the same page in the Channels Tab (see Screenshot below).
In the Edit settings, you can select for which channels you wish the following functions activated:
- Sync stock quantity to Nembol: Choose from which channels you want to sync the quantity to Nembol. Nembol will sync with all connected channels the inventory when sales occur on that channel.
-
Update products from Nembol: Edits made on (or synced to Nembol) will be synced to the channels you chose.
-
Update products from Shopify: Choose what single channel should lead stock and content changes, when the same product is listed on more channels. Currently works with Shopify channels only.
-
Transfer orders to Shopify: Nembol will create a copy of your multichannel orders inside your Shopify backend. All you have to do is choose which channels should send orders to Shopify.
That’s it, your account is up and running. For any kind of question or need, don’t hesitate to contact us via mail or via in-app chat.
Enjoy Nembol!
Complimentary: Nembol Easy Website
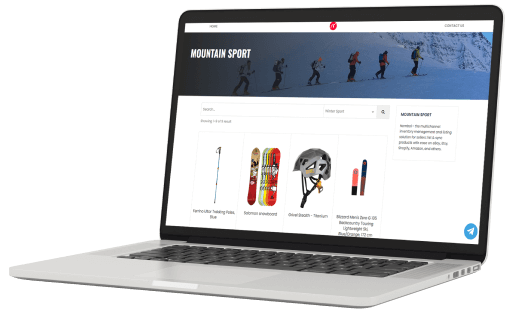
When subscribing to Nembol, if you like you get a free, personal website that features all the products you have in Nembol, with their pictures, prices, and a link to every channel where you listed them.
This is a direct way for customers to buy your products, because you can link it to your PayPal account.
The most important feature of Easy Website is that… you don’t need to set up anything. We designed it to be fully automatic. You can customize it with your logo, a banner image, a map to your physical store, and a WhatsApp/Telegram contact option. And it’s already mobile-optimized.
Find out more here: Nembol Easy Website
Try Nembol for free: enjoy a 14-day trial
No credit card required

